Using the Windows Installer
This chapter describes the installation process of Allegra for installation on an MS Windows based system such as Windows 10, Windows Server 2012 or Windows Server 2016 using the Allegra Windows Installer.
Preparation
First, you need to make sure that the installation environment meets all necessary requirements:
You must be logged in with administrator privileges.
Check that the hard disk on which programs are normally installed (usually
C:\Programs) has at least 800 MByte of free space.Install Java on the computer if you don’t already have it there. You can use Java 8 or Java 11. You can download it from the AdoptOpenJDK server.
There should not run any other software that provides services on port 80, like IIS, Skype or any other web server on the same machine. There should be no other Tomcat running on the server either. If there is, you will need to install Allegra manually.
If the default port 80 is used by another application, the installer will try to use the following ports in the following order before giving up:
Port 80
Port 8080
Port 8081
Port 7080
Port 9080
Attention
If you want to manage more than 25 users or many and large documents in the system, you should in any case use a powerful database server.
Downloading the Allegra Installer
You can download the Allegra installer for free from the Allegra download page.
Executing the Installer
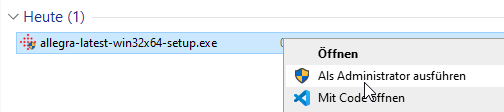
Right-click on the installer and select “Run as administrator” from the context menu.
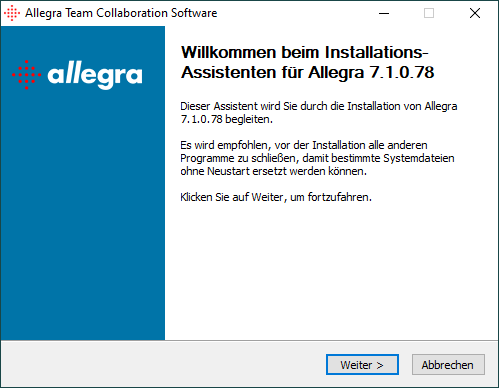
Follow the instructions in the installer. If you have not set up your own database, you can always use the default settings.
You should now see login instructions in one browser window and the login screen in a second window. Follow the instructions on the the hints screen or go to the instructions for the basic configuration.
Security
If you want to run the Allegra server productively, you should put it behind an nginx, Apache or IIS proxy server. This way you can ensure that only SSL-secured connections are used and you do not expose the Tomcat to the Internet.
Instructions on how to do this can be found here, for example: