Add a Custom Property
This section describes how to add a custom property to your installation.
First, you must be logged in as a system manager or system administrator.
Attention
If you want to add any attribute of type select list, you must create this list before starting the procedure described below (see Lists for Custom Item Attributes).
Switch to the Administration view. In the main menu, select Customize > Task Attributes.
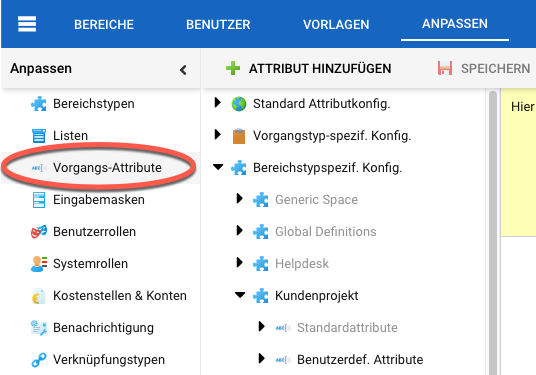
In the Properties navigation pane, click the leaf node where you want to add the custom property. In the example shown here, we will add a custom property to the “Requirement” task type.
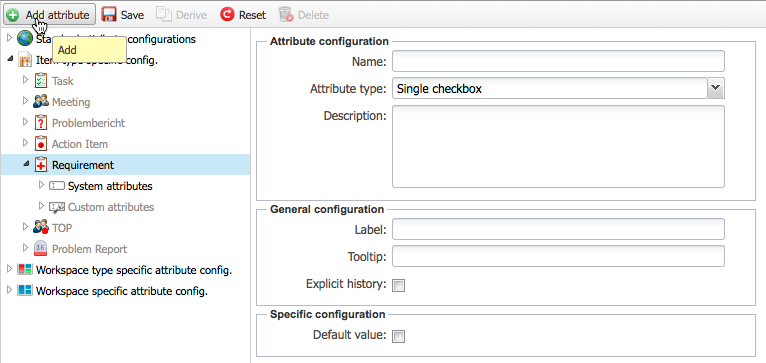
Click on the “Add” button in the toolbar.
Fill out the form that appears on the right. Select the type of property you want to create and give it a name. These properties will be searchable later on under this name.
Name: Under this name the properties will be referenced in reports and in search items.
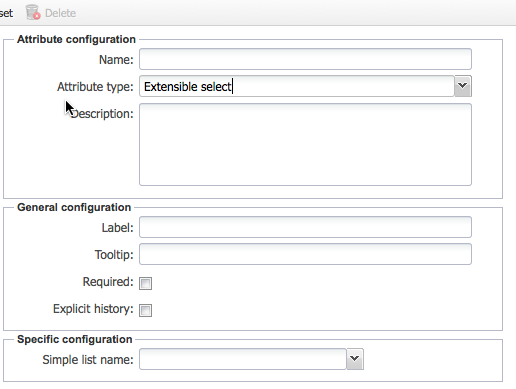
Attribute type: Select from the list of available types.
Attention
You cannot change the type of a property once you have created it.
Description: Optional field for administration and documentation only.
Enter a label for this property and, optionally, a tooltip. This label appears on the input forms where you place the property.
Note
If you mark the property as a required field and it appears on an input form associated with a “Create Item” action, the user must enter a value here. If the property does not appear on any form, there is no error message.
If you select “Explicit History”, the changes made to this task property are stored separately from other property changes. This is only useful if you want to analyze the change history for this property later. If not selected, the changes are recorded together with changes to other properties, which is typically sufficient and more efficient.
Fill in the property-specific configuration section, for example, enter default values or minimum and maximum values.
Click the “Save” button on the toolbar.
Your new custom property has been added. This property is now available to all projects if someone wants to use it. Although it is defined at a project level in this example, the custom property is automatically transferred to the system level for reuse.
Note
Before you can use your new property, you must add it to at least one input form.