Notification Triggers
The Allegra notification system operates in two stages. In the first step, a message is “triggered” and thus created. The second step verifies whether the underlying item meets the configurable criteria for sending the message. Only if this is the case, the notification will actually take place.
You can use notification triggers to define which events or actions trigger a message to you in a particular role. If the message meets your notification conditions, you receive the message. There are two types of actions that can trigger a message:
Creating new items
Editing existing items
You can define notification triggers separately for each of the two types of actions. To do this, you must be logged in as a system manager or system administrator.
Switch to Administration. In the main menu, select Customize > Notification.
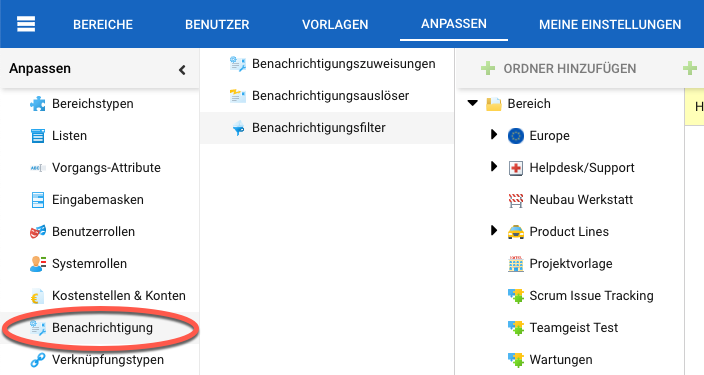
Define notification triggers
In the next navigation column, click on “Notification Triggers”.
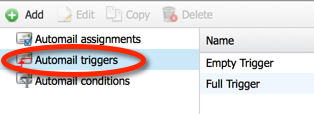
- To add a trigger, click the “Add” button on the toolbar.
To edit a trigger, select it in the right table pane, then use either the context menu or the “Edit” button.
Note
Triggers provided by a system administrator are visible to all system users. Other users can copy them to their private workspace and change them there. Normal users cannot change a system trigger directly.
Select the checkboxes according to your requirements.
The first line refers to creating an item. Here we leave out, for example, the checkbox for the author as we do not want to receive notifications for the items we have just created ourselves.
The other lines refer to task changes. For example, if you were manager of an item, you would be notified if somebody assigned someone else as the manager of that item.
Likewise, if you were the processor of an item, you would be notified if somebody assigned another person as the processor of that item.
The “Observer” column allows you to see changes made to any item you have read permission for, while the other columns always assume that you have a RACI role for an item. Normally, this is only useful in conjunction with a notification condition that limits the flood of notifications.
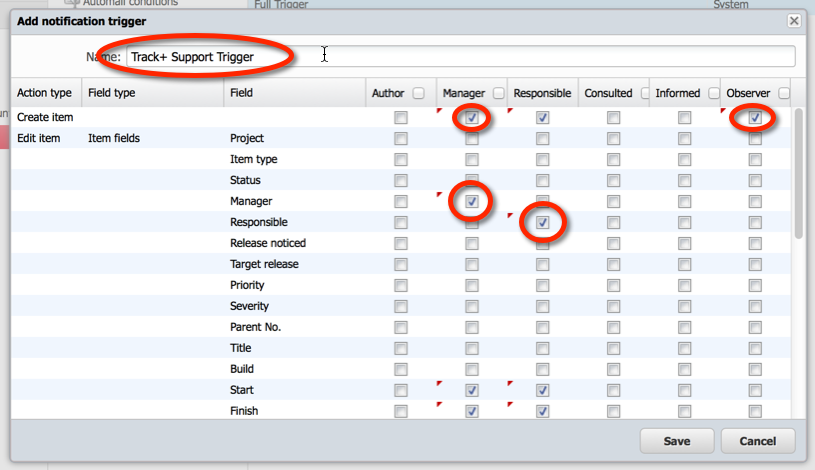
Give your trigger a name and save it.
Attention
These settings apply only to yourself acting in these roles, not to anyone else.
A “loud” trigger configuration has many checkboxes marked. A “quiet” trigger configuration has only a few checkboxes selected.