Assign Accounts
You can plan and monitor work and expenses using accounts that you assign to work workspaces. With accounts, you can distinguish between different types of work and expenses, such as development, administration, customer requests, and so on.
You must have enabled accounting on the General page of the workspace settings. Also, you must be logged in as a room manager, system manager, or system administrator.
Switch to “Administration”. From the main menu, select Workspaces. Alternatively, click on the workspace bar in the left navigation workspace.
Select a workspace in the left navigation pane.
In the second navigation pane, click the Assign Accounts node.
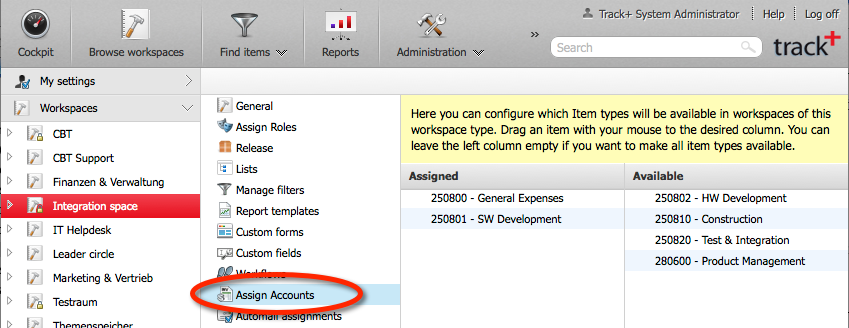
Drag accounts from the right-hand column labeled “Assigned”, to make those accounts available in this workspace. To remove an account, drag it back from “Assigned” to “Available”.
You can now enter budget and cost information for items in this workspace. If you deactivate an account or completely disable accounting for a workspace, existing information is retained in the background.